adventures with bleach
Remember how I said that I was going to create some shirts for our Disney trip? Well, I invested in some oh-so-expensive Gap stretch shirts ($3.99 for super comfy cotton!) for my experiments and got to work!
Adventure #1: Bleach Pen!
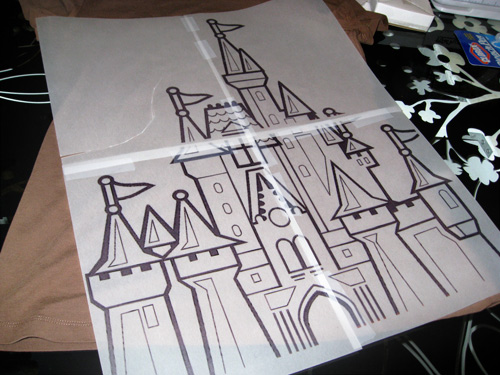
First, I picked out a bold b/w graphic that I wanted to use: Sleeping Beauty’s Castle. But the problem was that my image was only big enough to fit on an 8×11″ sheet of paper… and I kind of wanted something a little bit bigger. In order to enlarge it quickly and easily (as opposed to chopping layers on photoshop), I used blockposters and quadrupled its size. I printed out the images on 4 pieces of vellum, and taped them together to recreate the image.

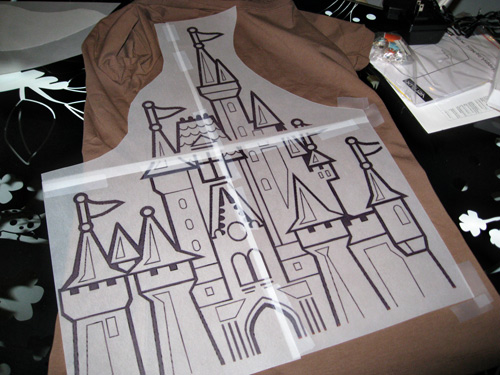
Then I quickly cut out off the excess paper (still leaving a good sized border) and taped down marking areas for where I’d like the design on the shirt. I ended up inking the design in 3-passes (top, bottom left & bottom right) so I made sure to put down good marks for where the pieces of paper needed to be laid back down.

I used plastic sheets inside of the shirt to prevent any bleeding, but you can easily use magazines or cardboard as well.
Then — I got to bleaching! For this project, I used a Clorox bleach pen (sorry for the lack of photos of “in process crafting” — the bleach was making me tear up a little bit), which you can find in your laundry soap aisle. I flipped the design over and basically just traced the lines in bleach, then laid it back down on the shirt and pressed down the vellum.
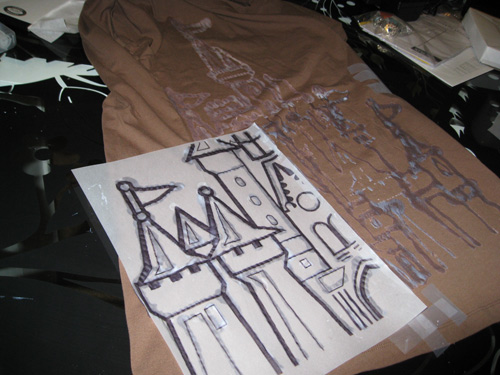
Here’s what the first pass (top half) looked like:

I went ahead and did the same thing with all three sections, and then waited for the design to dry:

I used a hair dryer to set the bleach (about 5 extra minutes of drying after I had laid down the last piece), and then rinsed out the shirt underneath the shower. Once it was rung dry, I put it in the dryer for 30 minutes to set the design up.
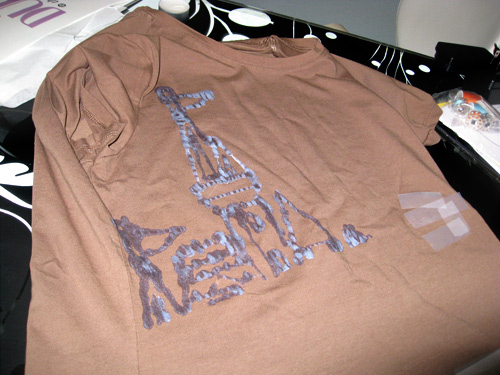
And in the end, I came out with this:

Now while it might not be instantly recognizable as Sleeping Beauty’s Castle, I think it’s a pretty fun artistic interpretation of it… thanks to bleach bleeding, air bubbles and my desire to be a bit more detailed than I should have been with the design. I was kind of operating off the cuff, since I’ve never seen anyone try and use a template to transfer the bleach. Next time around, I think I’ll invest in some stainless steel applicator tips (as recommended by Martha) to ensure more consistency with the bleech, maybe use a sheet of transparency paper instead of vellum, and leave the detail as an afterthought to fill in the design, rather than putting it on the template.


36 Comments
TikiBird
Kim, I LOVE that! And I love that you’re wearing a Sleeping Beauty Castle shirt to WDW! Show ’em what they’re missing. :)
kimberly michelle
Umm…. there’s a castle other than Sleeping Beauty’s? ;) I’m old-school like that… and will, despite the amount of acreage that Walt Disney World presents to me, always claim Disneyland as the Happiest Place on Earth. :)
Anon
Found your work through pintrest :)
And, yup, the castle at WDW is Cinderella’s Castle. Belle’s is at Euro Disney. I can’t remember which ones are in Hong Kong and Japan though; those might be duplicates.
LOVE the technique. Totally going to try it ^-^
Heidi
That looks incredible!!! You know some little girl is going to see your shirt and beg her mom to buy her one!
leah
You are a genius!
Kim
That is BRILLIANT. I’m totally impressed. And you rock that tee.
Shell
That’s fantastic! Thanks for sharing!
erin
Holy crapola-you’re way too crafty! That shirt is amazing! You can charge $65 at a local boutique!
talda
wait, that’s from a bleach pen? GENIUS!!! i don’t think i ever would have thought of that.
stacey
for really detailed stuff, try this tutorial…
http://www.craftster.org/forum/index.php?topic=278418.msg3150540
it’s amazing and works so well. pain in the butt to xacto knife all the little parts away, but the results are SO WORTH IT! :)
and, i’m jealous… i’ll be making myself a sleeping beauty castle shirt now too. :)
Cathleya
Holy mother of crafters. Show me the way. That is all.
Mei
Wow!! It looks amazing. I can’t wait to try it. Pure GENIUS.
Jenna
This has potential for an Etsy store if I’ve ever seen one. Can you imagine the money you would make from selling to those groups of families that go every year? In fact I have extended family that visits Disney World EVERY SINGLE YEAR. And they have like 6 kids, and the 6 kids are starting to get married and have babies and they take their babies and everything and go. So basically they need this. Not the tutorial (I will keep that a secret), just the shirts. From you.
Kim
wow! that turned out soooo cute! love it. :)
talda
i think you should host some sort of crafty get-together. yes, that’d be awesome! then you can show us all these nifty tips and tricks of the trade!
Polka Dot Bride
I REALLY love this T! I love how it’s abstract but it’s just the right amount of Disney :) Gorgeous!
Pingback:
Lucy
Way to discover a craft secret! Well done for making something so beautiful, so simply xx
mommajozy
Try using Freezer paper- Cut out a pattern of what you want to be bleached. Iron it down onto the fabric. Put a piece of card board or plastic behind the target area. Also protect the outside of the freezer paper pattern to protect the fabric from over spray. Now, LIGHTLY spray a 2 part bleach/ 1 part water mixture from a little cosmetic spray bottle. Do not SOAK. Do it again in a few minutes until it is as light as you want. Let each”coat” set a few, then spray again. Dry as you did, with a hair dryer, then rinse as you did.
TRY IT OUT ON SOMETHING SMALL AND USELESS TO SEE HOW IT GOES. Have fun!
Cat
Nice job. The castle at WDW is Cinderella’s Castle, they actually have a different castle at each one of their theme parks (including international ones.)
Monica
Love this! So well done. Don’t forget to use bleach-stop when you’re done. Bleach just keeps on bleaching regardless of rinsing with water. Dharma Trading Co. is one place that sells it.
Natalia
That’s awesome, It looks way better than it would’ve if it hadn’t bled and looked exactly like the picture…
Well done!
Ryan
That’s so cool. Will it work with coloring book pages?
vanessa
so cute! i love it hopefully i have some time to do it over spring break
nancy
II love this idea! So cute. I can’t wait to try it, and also the freezer paper/spray bottle method as well. But if you’re using bleach in a spray bottle, it’s definitely a good idea to wear a dust mask or at least a bandanna over your mouth and nose. Inhaling even a little diluted bleach spray can hurt your lungs.
MaddyLane
Super project creation, great site too, all fabulous
Angela Reizian
Love the bleach pen T-shirt. Vacation shirts are great too bad I do not have any kids to make them for. I’ll try it on a dogge T.
Teresa
I love it! Where did you get that pic of Sleeping Beauty Castle?
Tracy
Ingenious and creative! Too detailed for me, but I think I might try it with the outline of Mickey Mouse’s head!
metin
this is very creative, congratulations.
Pingback:
marilyn
this is amazing, i am going to make one….but i am going to use a bright pink shirt….make it a little more princessiey =]
mikayla
can u use spray bottle
Pingback:
Ramya
Hey Kim, that’s a great idea… Am surely gonna try it out on my purple tee…thanks! Very nice tutorial too…
Pingback: